OneTouch VerioIQ® – Getting A Blood Sample From The Fingertip
Products
OT Verio IQ Meter
Getting a blood sample from the fingertip:
Instructions: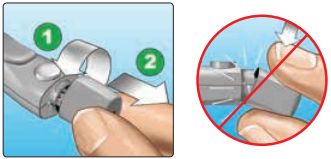
2. Insert a sterile lancet into the lancing device.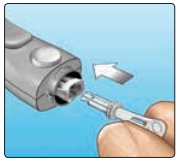

3. Replace the lancing device cap.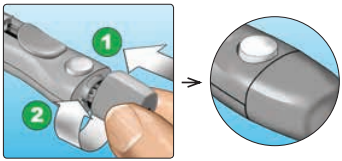
4. Adjust the depth setting.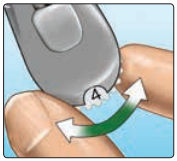
5. Cock the lancing device.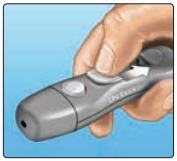
6. Insert a test strip to turn the meter on.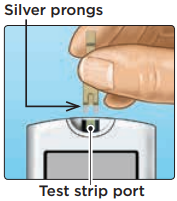
7. Puncture your finger.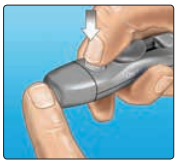
8. Get a round drop of blood.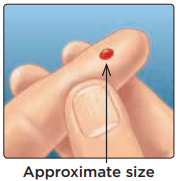
- Choose a different puncture site each time you test. Repeated punctures in the same spot may cause soreness and calluses.
- Before testing, wash your hands thoroughly with warm, soapy water. Rinse and dry completely.
Instructions:
1. Remove the lancing device cap.
a. Remove the cap by turning it counterclockwise and then pulling it straight off of the device.
2. Insert a sterile lancet into the lancing device.
a. Align the lancet as shown here, so that the lancet fits into the lancet holder. Push the lancet into the device until it snaps into place and is fully seated in the holder.
b. Twist the protective cover one full turn until it separates from the lancet. Save the protective cover for lancet removal and disposal.
- See article: OneTouch VerioIQ® – Removing The Used Lancet
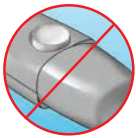
3. Replace the lancing device cap.
a. Place the cap back onto the device; turn clockwise to secure the cap.
b. Do Not overtighten.
4. Adjust the depth setting.
a. The lancing device has seven puncture depth settings, numbered 1 through 7. Smaller numbers are for a shallower puncture and the larger numbers are for a deeper puncture. Shallower punctures work for children and most adults. Deeper punctures work well for people with thick or callused skin. Turn the depth wheel to choose the setting.
- Note: A shallower fingertip puncture may be less painful. Try a shallower setting first and increase the depth until you find the one deep enough to get a blood sample of the proper size.
5. Cock the lancing device.
a. Slide the cocking control back until it clicks. If it does not click, it may already have been cocked when you inserted the lancet.
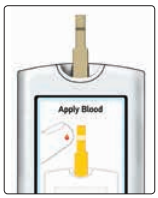
6. Insert a test strip to turn the meter on.
a. Insert a test strip into the test strip port with the gold side of the test strip and the two silver prongs facing you. No separate step to code the meter is required.
- Note: When testing in low light conditions or in the dark, press and hold OK before you insert the test strip to turn on the display backlight and test strip port light. This additional light may help you insert the test strip and complete the test.
b. When the Apply Blood screen appears on the display, you can apply your blood sample to either side of the test strip.
7. Puncture your finger.
a. Hold the lancing device firmly against the side of your finger.
b. Press the release button.
c. Remove the lancing device from your finger.
b. Press the release button.
c. Remove the lancing device from your finger.
8. Get a round drop of blood.
a. Gently squeeze and/or massage your fingertip until a round drop of blood forms on your fingertip.
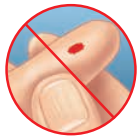
b. If the blood smears or runs, Do Not use that sample. Dry the area and gently squeeze another drop of blood or puncture a new site.
AW 06703306A